
Collard Greens are considered one of the healthiest foods you can eat.
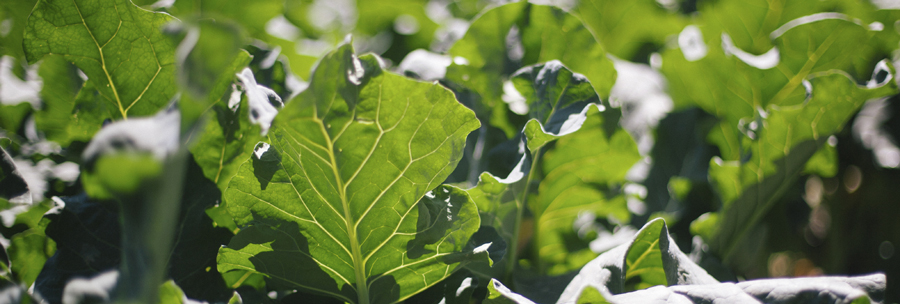
A dark green cruciferous vegetable, collards have a large, smooth leaf decorated with lightly colored venation and a wavy edge. The thicker part of the midrib is pretty tough and is usually discarded before preparation. (Add it to your compost bin or feed to your chickens.) Most popular in the American South, its nutritional value, versatility and flavor are prompting an increase in popularity around the world.
Collard greens are interchangeable in all of your favorite greens recipes. You can use collard greens in place of spinach, beet greens, kale, mustard greens, Swiss chard, dandelion greens or turnip greens. The flavor is closest to kale, though a bit milder, and will normally require a little more cooking time than spinach. It’s especially delicious in bean-based soups or stews and those made with spicy sausage.
How to Grow Collard Greens
One of the most cold-hardy vegetables, withstanding freezing temperatures into the upper teens, you can plant collard greens in the early spring or as a fall crop. In fact, south of zone 7 it is often grown throughout the entire winter season. Its flavor is somewhat sweeter when frost has touched its leaves.
Collard transplants should be planted 3 to 4 weeks before the last frost in the spring or 6 to 8 weeks before the first frost in the fall. If starting from seed, start them indoors about 8 weeks before you plan to transplant. You can also germinate in the garden; collard seeds germinate well with soil temperatures between 45 and 85°. When germinating indoors, the ideal soil temperature is between 60 and 70°. Indoors or out, the soil or planting medium should be kept consistently moist until the seeds have sprouted. A seed blanket or row cover will help maintain the ideal environment for germination.
Since collards are a leafy vegetable and are harvested often, these greens also need to be fed regularly for optimal output. We recommend you work nitrogen-rich soil amendments, such as blood meal, cottonseed meal or garden manure, into the soil prior to planting and then side dress with these same nutrients once a month or so to keep your collard crop at its healthiest.
 Collard greens will grow best with a soil pH of 6.5 to 6.8 and should not be planted in the same place you planted other cole crops, such as cabbage, Brussels sprouts or broccoli, in the prior year. In fact, a 2-year rotation interval is recommended to avoid soil-borne diseases common to cole-type vegetables from building up and affecting your crop.
Mulching with weed-free hay, finely ground leaves or bark will keep the weeds down, keep the soil cooler and moister and will also keep the leaves of your greens cleaner. Collard greens need about 1 to 1.5 inches of water per week. A rain gauge in your garden will help to ensure your greens are receiving the water they need.
How to Harvest Collard Greens
Collard green leaves grow from the middle of the plant. As you start harvesting, usually when the leaves are under 10 inches in length, harvest the outside, or lower leaves first. Select leaves with good color and no yellowing or browning. The smaller leaves are more tender, while the more mature leaves may be bitter. As you harvest, the lower stem will become bare, making your plants look somewhat like little trees. Leaves will continue to grow from the top-center of the plant through cool weather; they can even be harvested when frozen, though they’ll be brittle and should be handled gently.
Storing and Preparing Collard Greens
 Collard greens will store well in the refrigerator when kept in a plastic bag with as much air removed as possible. If you’ve washed them, lay them out on paper towels to dry or spin them in a salad spinner. They should remain fresh for 3 to 5 days.
You can also freeze them, but do so as soon after harvesting as possible. Figure a handful or two of greens per serving and freeze them in the appropriate size freezer bag for family or individual meals. (Freezer-type bags are thicker-walled and will better prevent freezer burn during storage.) Wash the leaves well in cold water and let them drain in a colander. Cut off the woody stems and any damaged or yellowing edges.
By serving size, you will be blanching the greens prior to freezing. Collards require 3 minutes, while all other greens need to be blanched for 2 minutes. Drop each serving size into the boiling water and cover; start timing immediately. After three minutes, scoop the greens out with a large slotted ladle or screen, letting the water drain for less than a minute, and then put them into the iced water, chilling them for another 3 minutes. The ice bath will stop the cooking process. Keep adding ice during the entire process to keep the water as cold as possible. You can reuse the boiling water for about 5 blanchings, adding hot water as needed to maintain the right level.
Allow the greens to drain well and then bag and tag’em with the type and the date. Remove as much air from the freezer bag as you can. You can use a straw, zipping the bag closed around the straw which has been inserted at one end. Suck the excess air out of the freezer bag and remove the straw as you close the bag completely. Going one step further, packaging a number of smaller bags inside a gallon storage bag will more completely protect your produce from freezer burn and will extend the freezer storage time.
When it comes to cooking collard greens, the first and most important rule is: DO NOT OVERCOOK. Overcooking makes for a mushy dish and can even result in a not-so-pleasant sulfur smell. We suggest, if you have not cooked collard greens before, that you ask friends or family or search the Internet for recipes that sound good to you. Here are the Top 20 Collard Greens Recipes from one of our favorite recipe sites.
As always, we welcome your comments and would love for you to share growing or harvesting tips and recipes.
We wish you happy and healthy gardening from all of us at GrowJoy!

No Comments